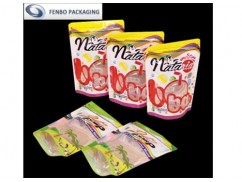
How do you make a stand pouch?
Jul 11,2024 | Views: 927
Creating a stand pouch involves several steps, typically involving design, material selection, printing, and the actual manufacturing process. Here’s a detailed guide:
Printing ink (if you’re adding graphics or text)
Adhesive (for laminating layers together)
Zipper or spout (optional, for resealable pouches)
Heat sealer (for sealing edges)
1. Design the Pouch
Determine the size and shape of your stand pouch.
Create a design for any graphics or text you want on the pouch.
2. Select Materials
Choose appropriate plastic films based on the product you’ll be packaging (e.g., food-grade, high-barrier properties for perishable goods).
Decide if you need a single layer or multiple layers for added strength and barrier properties.
3. Printing
Print your design onto the plastic film using a flexographic or rotogravure printing process. Ensure the ink used is compatible with the material and suitable for the product type (e.g., food-safe ink).
4. Laminating
Use a form-fill-seal (FFS) machine to form the pouch. The machine folds the laminated film into the desired shape and seals the sides and bottom using heat.
For a stand-up pouch, gussets are typically added at the bottom to allow the pouch to stand upright. The FFS machine can create these gussets during the forming process.
6. Adding Features
Add a resealable zipper or spout if needed. These can be heat-sealed onto the pouch.
Ensure that any added features align correctly and seal properly to maintain the pouch’s integrity.
7. Sealing
Seal the top of the pouch if it’s pre-filled, or leave it open for filling later. Ensure all seals are airtight to protect the contents.
8. Quality Control
Inspect the finished pouches for defects such as leaks, weak seals, or misprints.
Test the stand-up capability and the strength of the seals.
9. Packaging
Package the pouches for shipment or storage, ensuring they are protected from damage.
Seal Strength: Test the seal strength regularly to avoid leaks.
Design Clarity: Ensure that printed designs are clear and legible, with vibrant colors and proper alignment.
Environmental Considerations: Consider using recyclable or biodegradable materials to reduce environmental impact.
Creating a stand pouch requires precise machinery and careful attention to detail to ensure the final product is functional, durable, and visually appealing.
Prev: Why use stand up pouches?
Next: How thick is a stand up pouch?
Materials Needed
Plastic films (like polyethylene or polypropylene)Printing ink (if you’re adding graphics or text)
Adhesive (for laminating layers together)
Zipper or spout (optional, for resealable pouches)
Heat sealer (for sealing edges)
Steps to Make a Stand Pouch
1. Design the Pouch
Determine the size and shape of your stand pouch.
Create a design for any graphics or text you want on the pouch.
2. Select Materials
Choose appropriate plastic films based on the product you’ll be packaging (e.g., food-grade, high-barrier properties for perishable goods).
Decide if you need a single layer or multiple layers for added strength and barrier properties.
3. Printing
Print your design onto the plastic film using a flexographic or rotogravure printing process. Ensure the ink used is compatible with the material and suitable for the product type (e.g., food-safe ink).
4. Laminating
If using multiple layers, laminate them together. This process involves applying adhesive between layers and passing them through rollers to ensure a firm bond. The laminated structure provides durability and barrier properties.
Use a form-fill-seal (FFS) machine to form the pouch. The machine folds the laminated film into the desired shape and seals the sides and bottom using heat.
For a stand-up pouch, gussets are typically added at the bottom to allow the pouch to stand upright. The FFS machine can create these gussets during the forming process.
6. Adding Features
Add a resealable zipper or spout if needed. These can be heat-sealed onto the pouch.
Ensure that any added features align correctly and seal properly to maintain the pouch’s integrity.
7. Sealing
Seal the top of the pouch if it’s pre-filled, or leave it open for filling later. Ensure all seals are airtight to protect the contents.
8. Quality Control
Inspect the finished pouches for defects such as leaks, weak seals, or misprints.
Test the stand-up capability and the strength of the seals.
9. Packaging
Package the pouches for shipment or storage, ensuring they are protected from damage.
Tips for a Successful Stand Pouch
Material Compatibility: Ensure all materials used are compatible with each other and suitable for the intended product.Seal Strength: Test the seal strength regularly to avoid leaks.
Design Clarity: Ensure that printed designs are clear and legible, with vibrant colors and proper alignment.
Environmental Considerations: Consider using recyclable or biodegradable materials to reduce environmental impact.
Creating a stand pouch requires precise machinery and careful attention to detail to ensure the final product is functional, durable, and visually appealing.


